
On the behalf of my good friend, I am posting a number of his project write-ups for the electronics hobbyist community. In what I hope will the first of many more, learn how to:
BUILD A VIDEO SURVEILLANCE STORAGE RECORDER
Len Long, W1ZTL
INTRODUCTION
This article describes how to build and configure a simple video acquisition system which includes inexpensive wifi cameras, a tiny Windows based computer, a fan, required interfaces and power modules.
PURPOSE
The purpose of this article is to provide the reader with detailed information on an easy to build video surveillance storage recorder.
SCOPE
The scope of this article is aimed at people who enjoy building, have a need for a video surveillance system, and who know how to operate a Windows 10 computer.
SYSTEM DESCRIPTION
This system utilizes an Intel Stick computer which was designed to bring Internet and other inputs to a television set with an HDMI input. Free ContaCam software allows one to provide all of the functions of a professionally marketed system. Assembly is easy. You take the Intel Stick and plug in the USB to Ethernet adapter into one of the Stick’s USB ports and plug in the LAN into your switch or router. An option would be to use the WiFi capability of the stick but I chose to plug it in because of the limited range of the Stick. At the fan’s input you want to protect the Stick from spikes so place series diodes and a 1 microfarad and 10 microfarad capacitor in parallel with the series diodes in the circuit. Load the Stick with TightVNC as well as your LAN connected computer and you have a remote desktop that you can use for adjusting the software, viewing the output of your cameras, and playing back any part of the video that is stored. Plug in the 5 volt wall wart and you are in business.
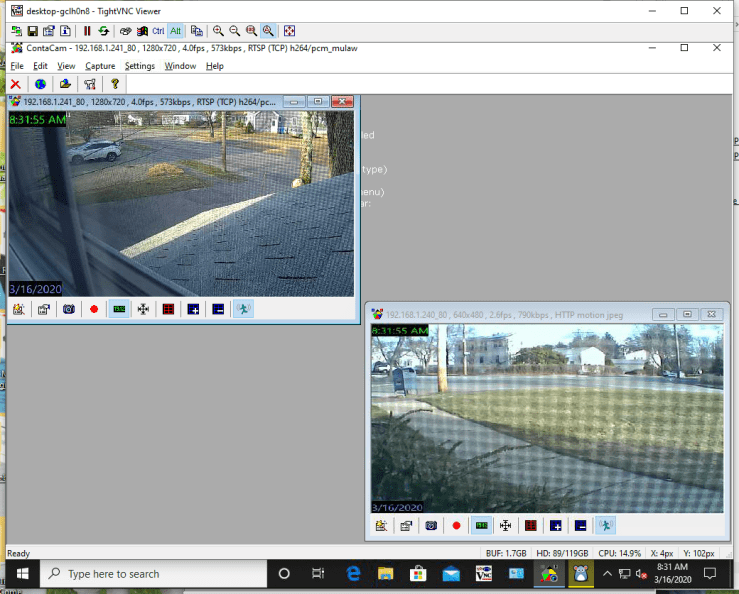
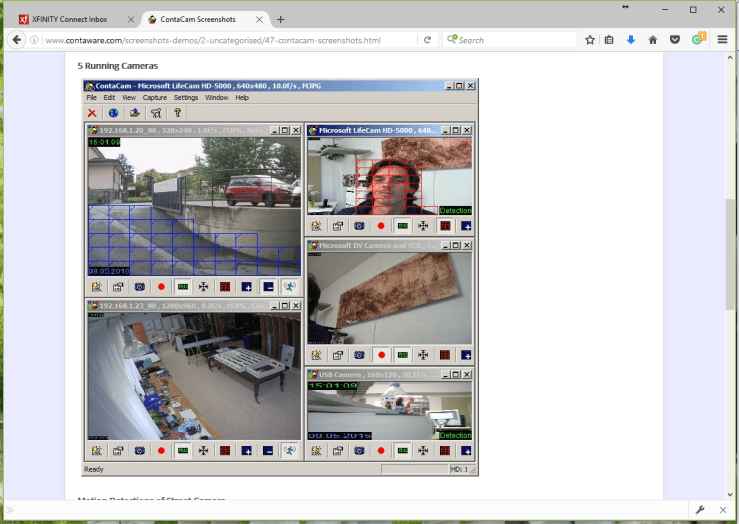
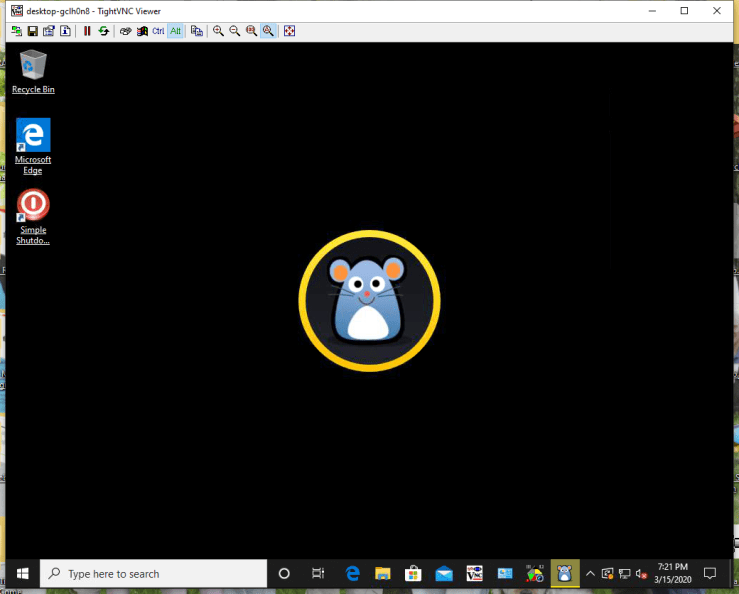
The following figure is what you see on your remote, LAN connected computer
Initial setting up the Intel Stick includes plugging on the HDMI input of a display and placing a mouse into one of the USB ports. Download and excute TightVNC and the rest can be done remotely.
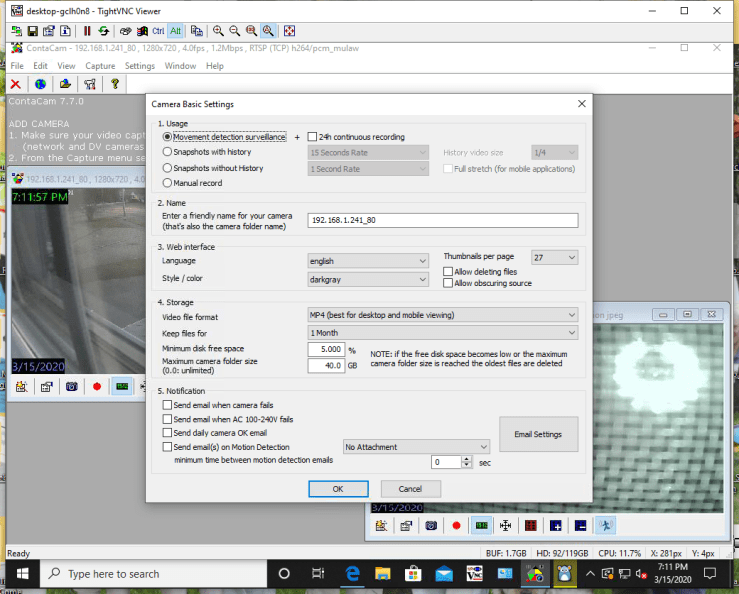
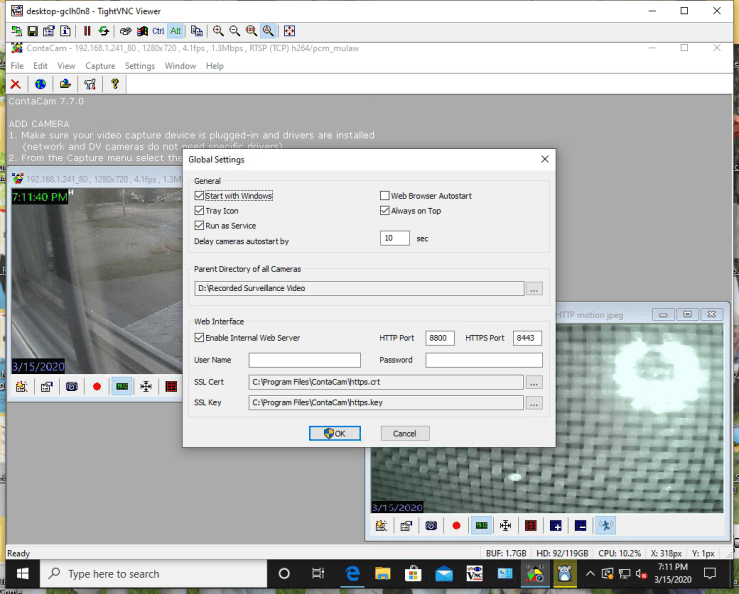
Load ContaCam and Move Mouse software and adjust MoveMouse to synthesize mouse movements every minute. Then setup the ContCam software as in the figures.
HARDWARE
The system goes together very easily and quickly. You can plug in a USB camera or several with a powered hub or use inexpensive Foscam WiFi cameras. With a USB camera plugged into my system, the system failed periodically so I just use the Wi-Fi cameras.
https://smile.amazon.com/gp/product/B006DAOJTY/ref=ppx_yo_dt_b_search_asin_title?ie=UTF8&psc=1
The following figure shows the system mounted on a wall of a fire and security cabinet. The wire coming from the top of the box is a USB port which can be used for the input of a USB camera.

The next photo shows the back of the system box. The blue wire is an Ethernet connection which goes to a switch, hub or router. Note the Velcro which is used to mount the system on the fire alarm cabinet.

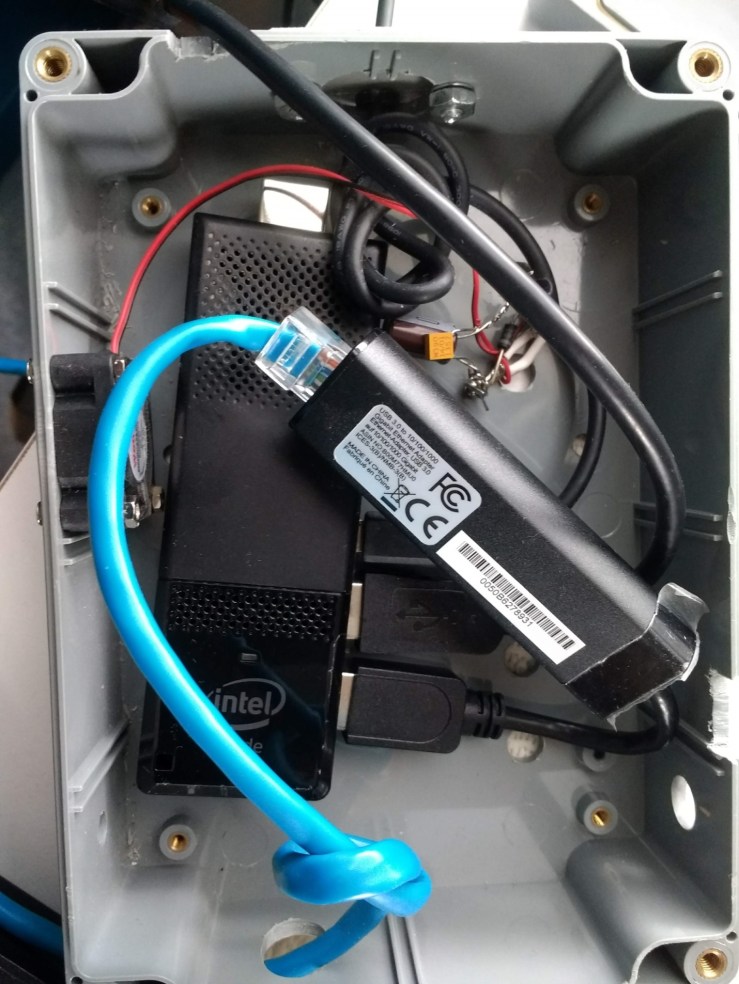
The next photo shows all of the components of the system including the intel Stick, the USB to Ethernet adapter, the Ethernet blue cable, the cooling fan and the filter components for the fan.
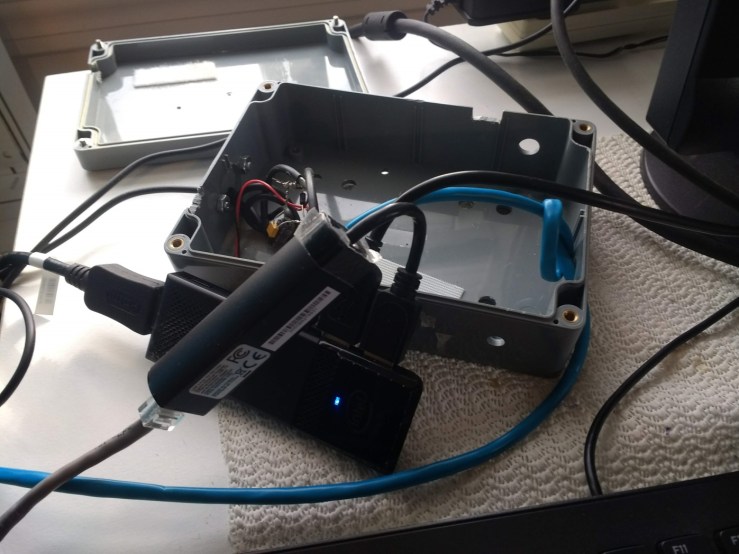
The next photo shows the system components out of the box.
The next photo shows the detail of the fan mount and its filter components.

SOFTWARE
Using the free ContaCam software you can configure the system to watch a certain area for movement, record continuously and have a several camera display (like a quad display).
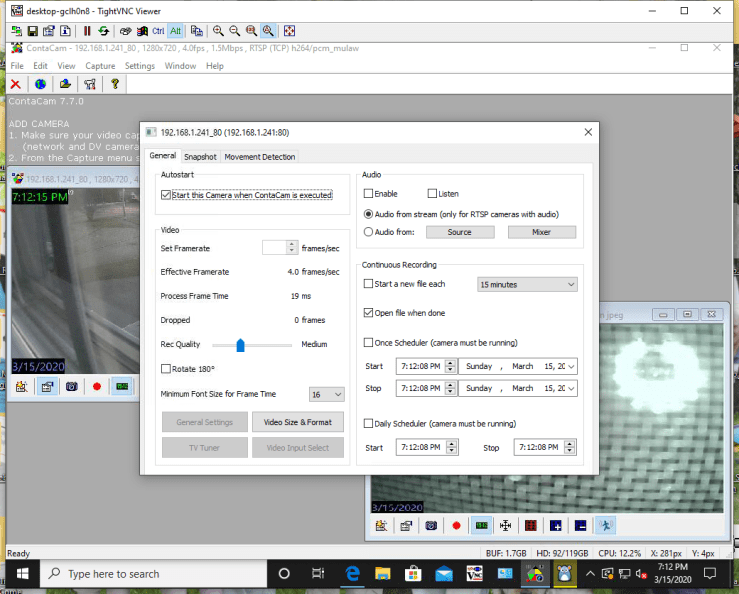
The next illustrations are screen shots of the proper adjustments of ContaCam in my system.


Insert a large capacity SD card into the Intel Stick. This is your hard drive. Create a file folder for each camera on the SD card.
I set up ContaCam on another system as follows:

Usage: Click Movement detection and 24h continuous recording box.
Name: Enter name of camera
Storage: MP4, Keep files forever, Maximum camera folder size 250GB, Send e-mail on malfunction – enter e-mail address
Cameras are set up to display 6 cameras. No zone detection is set up

Motion detection not set up on this system
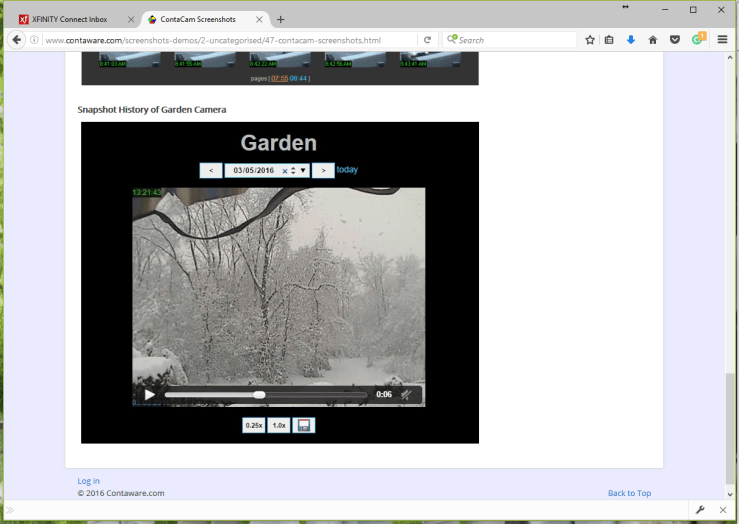
Set up snapshots to facilitate reviewing video

General:Start with Windows, Tray Icon, Run as Service, Always on top.
The service will automatically run when you start your system.
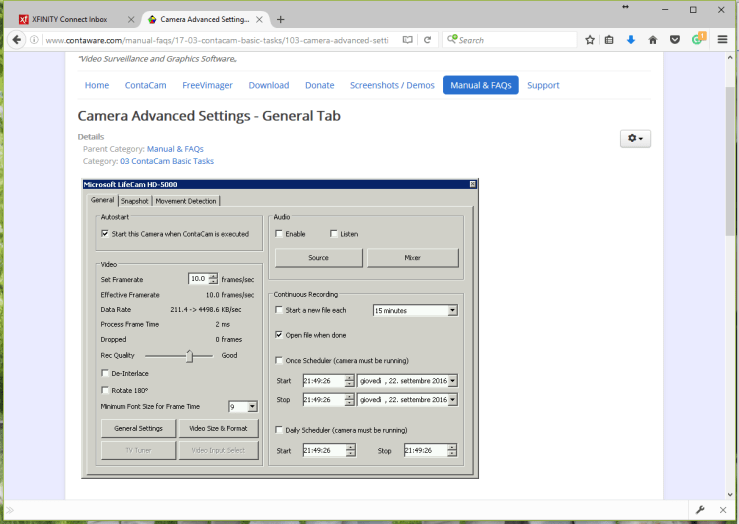
Autostart
Framerate: 4frames/sec
Uncheck Open file when done
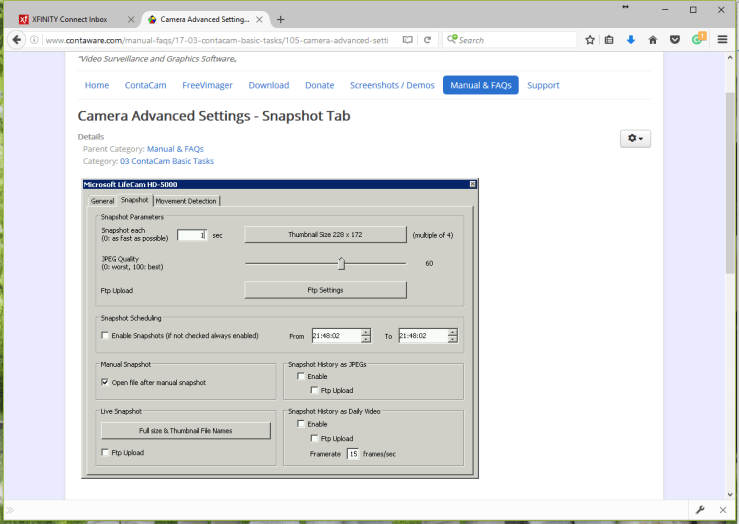
Snapshot every 1 second
You can remotely control this system using another free software application, TightVNC. You can also configure it so you can poke a hole in your router’s firewall in order to view the video anywhere on earth that there is internet.
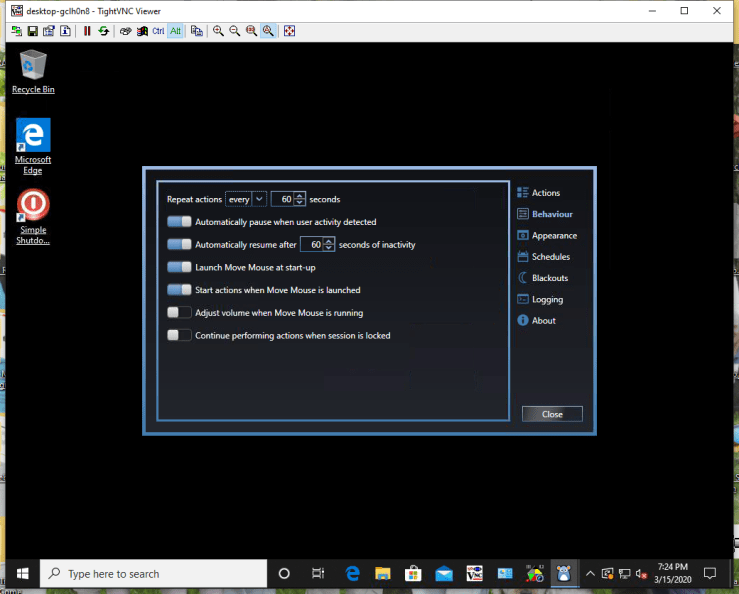
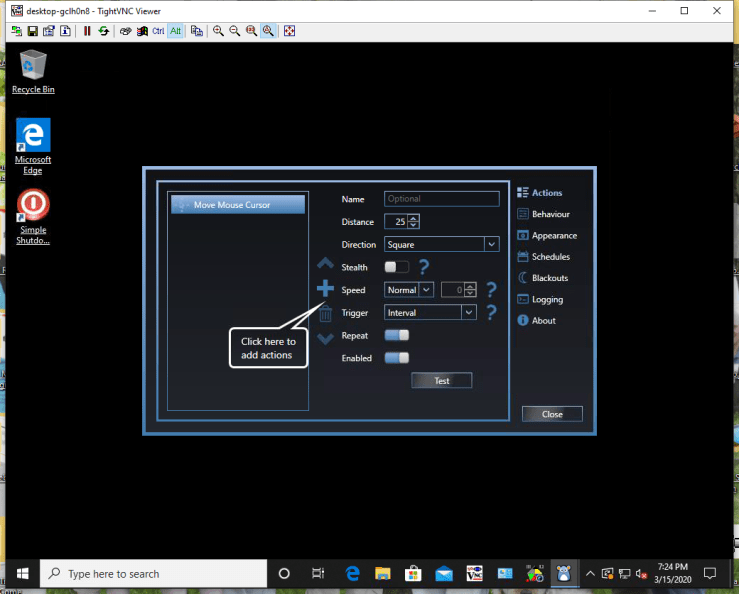
In order to prevent the computer going to sleep you can use Move Mouse that can input artificial mouse movement at a predetermined interval, like every minute. The next illustration shows screen shots of the Move Mouse application.

The cameras which I used were inexpensive FOSCAM pan and tilt units. The following shows how to set them up. Find the cameras using the free IP Camera Tool, open a browser and insert the IP of the desired camera in the URL line and then follow the camera setup instructions which follow.
FOSCAM CAMERA SETUP


Click the Server Push mode. This screen shows what the camera is seeing. Click on the device management control pan and tilt with arrows in the circle above.
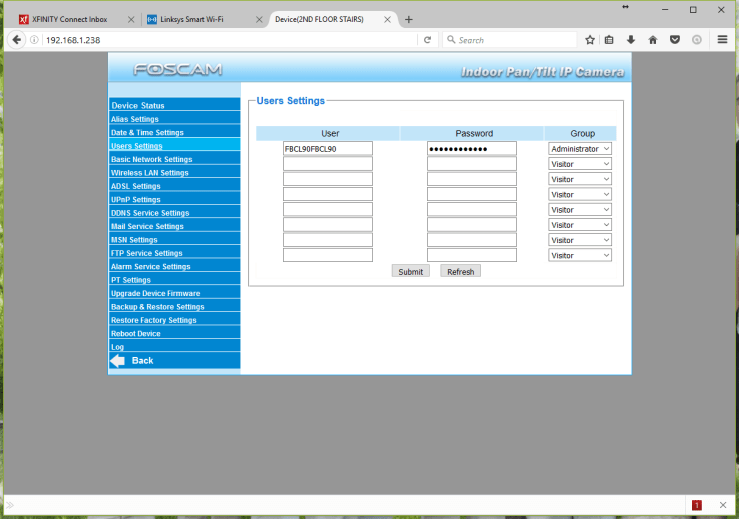
Enter the name of the camera here on the Alias setting. Chose the right time zone here and click the bottom boxes. Choose 60 minutes when a dropbox appears below the bottom box. The enter the username and passwords.
Enter the IP adderess of the camera – I used 192.168.1.X where X identifies the camera. The subnet mask is 255.255.255.0 and the gateway as well as the DNS server is 192.168.1.1. Enter in the port chosen for the camera. The default is 80.
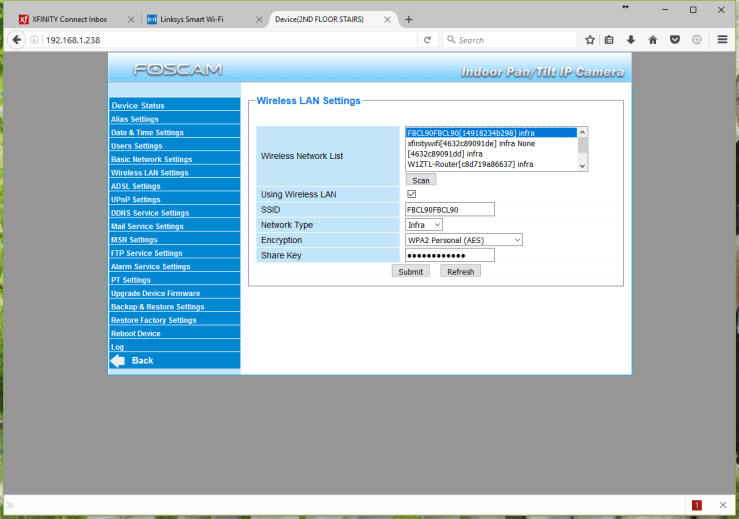
Choose the router from the list. The Share Key should be on the back of it. Make sure that the rest of the boxes are as illustrated.
ContaCam has a feature where you can instantly review video from any time. It’s screen looks like this: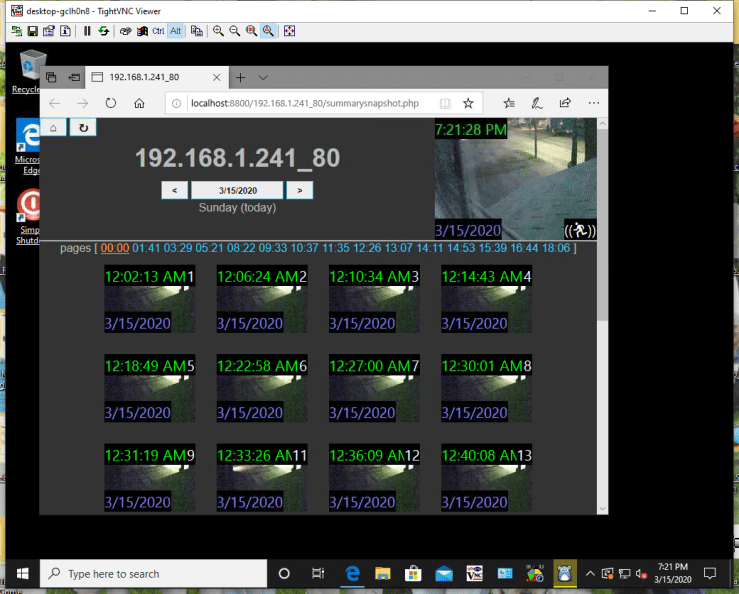
A handy tool to find your camera on your local area network is the IP Camera Tool. Run the free IP Camera Tool and all cameras within range of the wireless LAN system will be listed as below: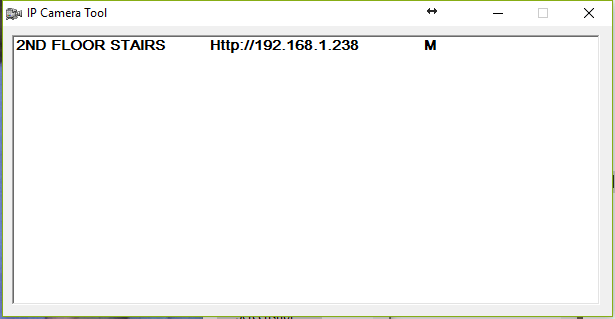
PARTS LIST
HARDWARE
- Intel Compute Stick with Windows 10 Intel Atom x5 Processor (BOXSTK1AW32SC).
- 5VDC Wall Wart included with the Intel Stick
- AmazonBasics USB to 10/100/1000 gigabit Ethernet Internet adapter
https://smile.amazon.com/gp/product/B00M77HMU0/ref=ppx_yo_dt_b_asin_title_o02_s00?ie=UTF8&psc=1
- 128GB SD card
- 6” x 8” x1” plastic electrical box
- 1” Wathai 30x30x10mm 30mm 5v brushless dc cooling exhaust fan
- 2 – 1n4005 diodes
- 1 microfarad capacitor
- 10 microfarad capacitor
- Foscam Wi-fi F18910W pan and tilt cameras or equivalent
SOFTWARE
- Move Mouse
- Windows 10
- ContaCam- free video software https://www.contaware.com/download.html
- TightVNC
– TightVNC remote desktop software-32 bit
https://www.tightvnc.com/download.html
– 6″x8″x1″ plastic case –
(I used a plastic box I has on hand)
– 1″ fan with steering diode and capacitive filter
https://smile.amazon.com/gp/product/B07PDK1MJ2/ref=ppx_yo_dt_b_asin_title_o00_s00?ie=UTF8&psc=1
Equipment Manuals
Library Level Router
Netgear N300 WiFi Range Extender WN2000RPT
http://www.downloads.netgear.com/files/GDC/WN2000RPT/WN2000RPT_UM_8Dec10.pdf
Foscam FI8910W Wireless Camera
http://foscam.us/downloads/FI8910W%20User%20Manual.pdf
